MIDI Instrument
Using the Arduino Uno to make music along with SynthEdit
To achieve this you will need the following items;
- Arduino Uno
- USB lead
- LDR
- Switch
- 10K resistor
- 220r resistor
- Midi to USB interface
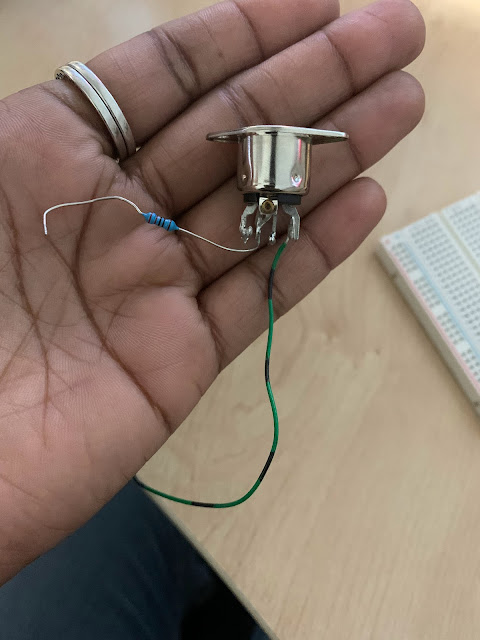
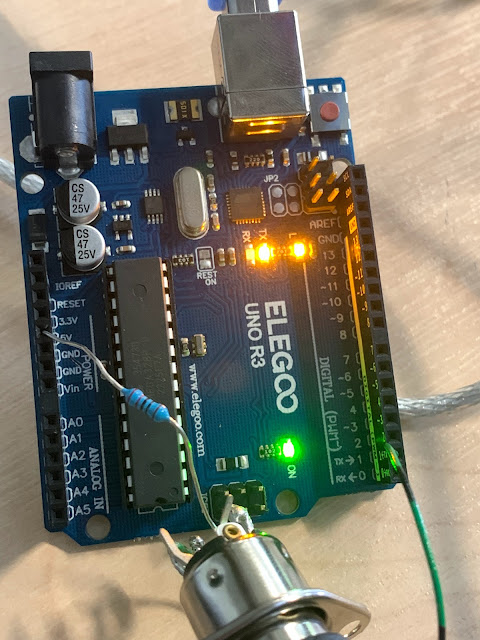
After plugging in the Midi connect the resistor in 5V and wire in TX >1.
This will create a sound going up in scale to ensure that the code was uploaded successfully.
Within the Midi code in the for loop note is denoted with hexadecimal.
- 20 start
- < 72 condition
- ++ (add one to it)
To make it easier to read we will change to the number is corresponds with.
Essentially this code is reading to start the note at 20 and increase in 1 increments but must stay below 72. if higher return to 0 and continue on. the volume set is between 120 and 0.
After we will connect the potentiometer to control the pitch of the notes.
Combining the blink speed code from the previous week with the midi will allow for tempo and intervals of notes to be played, creating a musical instrument. Before this code can be uploaded we must ensure that the midi is disconnected from the Uno for proper transfer. Additionally, we will need the following to create sequence notes and tempo;
- 2 breadboards
- 5 potentiometers
- approximately 18 breadboard jumper wires
- Midi to USB interface
- Arduino UNO
- USB lead
MIDI, short for Musical Instrument Digital Interface, is a way for instruments like synthesizers, samplers, and computers to talk to each other. It lets them share information through MIDI messages. MIDI became popular in the 1980s when smaller and cheaper synthesizers came out. Before MIDI, connecting instruments together was tricky because there were no set rules. MIDI fixed that by creating a standard everyone could follow. Completed in 1983 by a group of music equipment makers like Korg, Roland, and Yamaha, products using MIDI, like the Yamaha DX7, became widely available.
Examples of other standards in various domains include:
1. USB (Universal Serial Bus): A standard for connecting peripherals to computers and other devices. USB provides a common interface for devices like keyboards, mice, printers, and storage drives to connect and communicate with computers.
2. HTTP (Hypertext Transfer Protocol): The foundation of data communication on the World Wide Web. HTTP defines how web browsers and servers exchange information, enabling users to access and interact with websites.
3. JPEG (Joint Photographic Experts Group): A standard for compressing and encoding digital images. JPEG is widely used for storing and sharing photographs and other types of images on the internet and in digital media.
4. PDF (Portable Document Format): A standard for representing documents in a manner independent of application software, hardware, and operating systems. PDF ensures that documents appear and print the same way across different platforms.
5. ISO 9000: A family of quality management standards that provide guidance and tools for organizations to ensure their products and services consistently meet customer requirements and regulatory standards.
These standards, like MIDI, play crucial roles in their respective domains by enabling interoperability, consistency, and efficiency in various processes and technologies.
Footnote


Comments
Post a Comment